Qaba Rocking Horse Assembly - A Parent's Guide
Bringing a new plaything into your home, especially one that will spark so much joy, is pretty exciting, you know? When that big box arrives, full of promise for giggles and pretend adventures, there's a certain buzz in the air. For many families, that box holds a delightful Qaba rocking horse, perhaps a soft, cuddly unicorn, or maybe even a charming dinosaur, all ready to become a treasured part of your little one's world. Getting it ready for those first rides can feel a bit like a small project, but it's totally manageable, and actually, kind of fun to do.
These wonderful Qaba creations, whether they feature realistic hoofbeats or just offer a quiet, gentle sway, are designed with young adventurers in mind. They come with a sturdy wooden base and a strong metal frame, built to handle lots of happy bouncing and rocking. You might be wondering, naturally, about putting one of these together, and that's perfectly normal. We're here to walk you through it, making sure your experience is as smooth as possible, so your child can start their playtime escapades without a hitch.
Getting your child's new rocking friend set up doesn't have to be a big puzzle; in fact, it's quite straightforward once you have a good idea of what's involved. Qaba makes these toys to help with a child's growth and learning, so setting them up should feel like a part of that positive experience. We'll go over everything you need to know, from the moment you open the packaging to those last little touches, ensuring your Qaba rocking horse assembly is a breeze. Seriously, you'll have it ready for action in no time at all.
- Pinkpantheress Human Bones
- Little Brunette Baddie
- Pants Down Funny
- Nara Smith Back Of Hair
- Doen Birdie Dress
Table of Contents
- Getting Ready for Qaba Rocking Horse Assembly - What's in the Box?
- Gathering Your Helpers for Qaba Rocking Horse Assembly
- How Do You Start Your Qaba Rocking Horse Assembly?
- Putting Together the Base for Your Qaba Rocking Horse Assembly
- What Should You Watch Out For During Qaba Rocking Horse Assembly?
- Adding the Plush Friend - The Final Steps of Qaba Rocking Horse Assembly
- Is Your Qaba Rocking Horse Assembly Really Done?
- Keeping Your Qaba Rocking Horse Assembly Safe and Sound
Getting Ready for Qaba Rocking Horse Assembly - What's in the Box?
Before you even think about putting anything together, it's a good idea to get everything out and have a look, you know? The first thing to do is find a nice, open spot on the floor where you can spread out all the bits and pieces without tripping over anything. This makes the whole Qaba rocking horse assembly process much simpler. You'll want to take a moment to carefully open the box and gently pull out all the parts. Sometimes, these items are wrapped up pretty well to keep them safe during their trip to you, so just take your time with it.
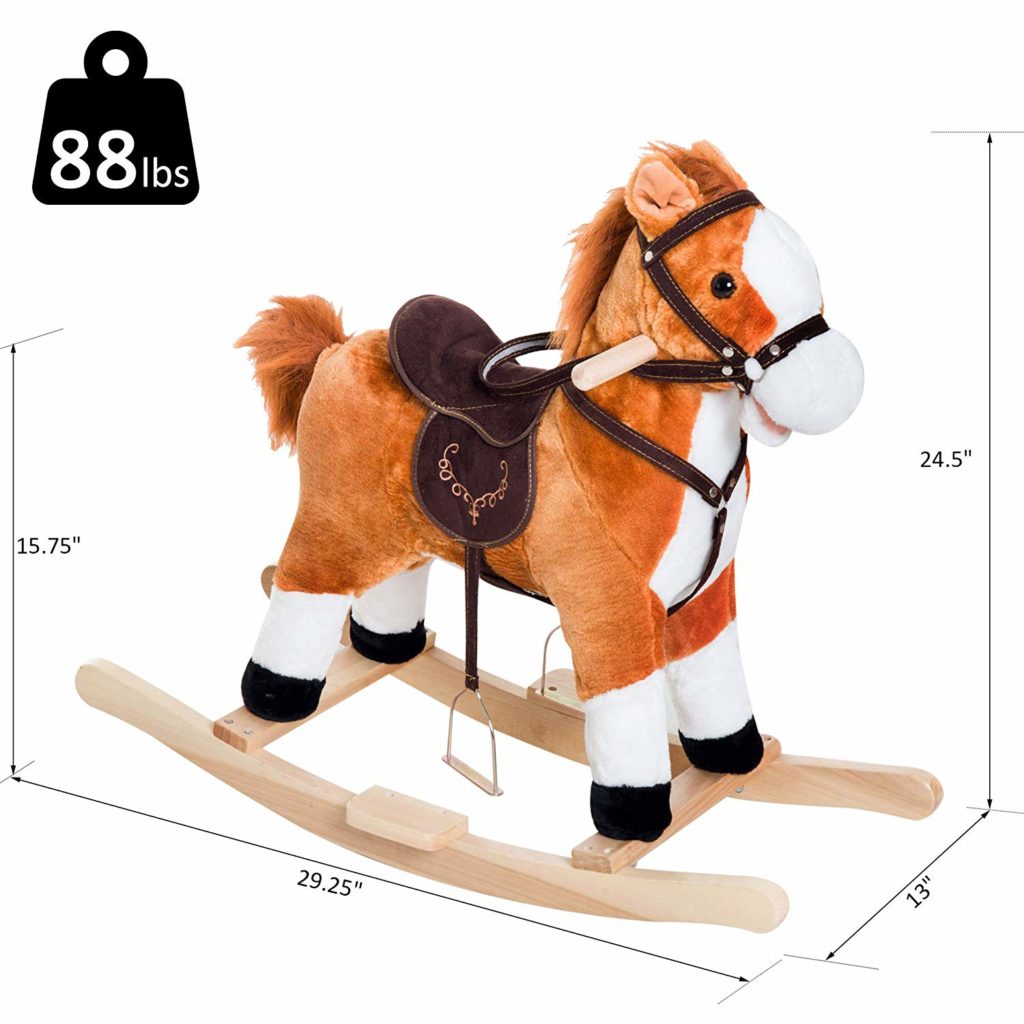
Once everything is out of its packaging, you'll probably see a few main components. There will be the plush body of the rocking animal itself, which might be a horse, a unicorn, or even a dinosaur, depending on the one you picked. Then, you'll find the pieces that make up the sturdy wooden rocking base, usually a couple of curved runners and some connecting bars. There's also the metal framework that supports the plush body and attaches to the base, which is actually quite strong. You might also find a little bag with all the screws, bolts, and maybe a small tool or two, so keep an eye out for that.
It's a really good habit to check the list of parts that usually comes with the instructions, just to make sure everything is there, too it's almost a mini-inventory. This way, you avoid getting halfway through your Qaba rocking horse assembly only to discover a missing screw, which, honestly, can be a bit of a bummer. If anything seems to be missing or looks a little off, it's always best to reach out to the company before you go any further. They're usually very helpful and can get you what you need to finish the job.
- What Does Fl Mean In Relationship
- 1 Percent Game Show Clock Question
- Disney Pixar Blacked
- Black Characters With Braids
- Ortega Sisters Lesbian
Gathering Your Helpers for Qaba Rocking Horse Assembly
Even though putting together a Qaba rocking horse is something you can probably do on your own, having a few simple tools ready makes the job go much faster and smoother, in a way. You won't need a huge collection of specialized equipment, just the basics that most folks have around the house. Usually, you'll want a Phillips head screwdriver, maybe a small wrench if the kit doesn't provide one, and perhaps a pair of scissors to open up any plastic bags holding the smaller parts. Having these things close by means you won't have to stop mid-task to go hunting for them.
Sometimes, the package will come with a little Allen key or a basic wrench, which is really handy because then you don't need to find your own. It's a good idea to check the instruction booklet for a list of what's needed, just to be sure. Having a clear, flat surface to work on is also a big helper; a kitchen table or a clean patch of carpet works really well. This prevents small pieces from rolling away and getting lost under furniture, which, as a matter of fact, happens more often than you'd think during any Qaba rocking horse assembly project.
And if you have a little helper, like your child, who is old enough to understand not to touch the small parts or put things in their mouth, they can be a wonderful supervisor! They might even hand you a tool, or simply offer moral support. Just make sure they're kept at a safe distance from any small pieces or tools that could be a hazard. This way, the Qaba rocking horse assembly becomes a shared anticipation for the fun times ahead, and it's actually quite sweet to see their excitement grow as the toy takes shape.
How Do You Start Your Qaba Rocking Horse Assembly?
The very first step, after you've checked all your parts and gathered your tools, is to take a good look at the instructions, you know? Even if you're someone who likes to just figure things out as you go, these manuals are actually quite helpful, especially with something like a Qaba rocking horse assembly. They usually have pictures or diagrams that show you exactly which piece goes where, and in what order. Giving them a quick read-through from start to finish can save you a lot of time and head-scratching later on, seriously.
Most of the time, the instructions will guide you to start with the base of the rocking horse. This makes a lot of sense because it provides a stable foundation for everything else to connect to. You'll typically find two curved wooden runners, which are the parts that allow the horse to rock back and forth. These runners will then be joined together by a few straight wooden bars or dowels. It's usually a matter of lining up holes and inserting screws, which is pretty straightforward, to be honest.
When you're putting these first pieces together, don't tighten everything down super tight right away, you know? It's often better to just get all the screws or bolts started and loosely connected. This gives you a little bit of wiggle room to adjust things if they don't quite line up perfectly. Once all the pieces for that section are in place and everything looks square, then you can go back and gently tighten each fastener. This method helps ensure a solid and even build for your Qaba rocking horse assembly, preventing any wobbles down the line.
Putting Together the Base for Your Qaba Rocking Horse Assembly
So, focusing on the base, you'll typically have two main curved pieces, which are the rockers themselves. These are what make the toy go back and forth. You'll usually connect these with a few crossbars. These crossbars might have pre-drilled holes, and you'll use screws or bolts to attach them to the rockers. It's a bit like building a small wooden bridge, where each piece supports the others. Make sure the flat side of the crossbars is facing the correct way, as the instructions will show you, because that's actually important for the next steps of your Qaba rocking horse assembly.
As you're putting the base together, pay a little bit of attention to how the screws go in. You don't want to strip the wood by overtightening, but you do want them to be snug. If you're using a screwdriver, just turn until you feel a good amount of resistance, but don't force it. If you're using an Allen key or a wrench, again, a firm turn is good, but no need to put all your strength into it. A stable base is really important for safety and for the smooth rocking action, so this step is pretty key.
Once the wooden base is all put together and feels sturdy, you're in a really good spot. This part is usually the most foundational, so getting it right means the rest of your Qaba rocking horse assembly will go much more smoothly. Give it a little shake to test its stability, just to make sure all the connections feel secure. If anything feels loose, go back and gently tighten those fasteners. You want that base to be as solid as a rock, or rather, as solid as a perfectly rocking horse base should be.
What Should You Watch Out For During Qaba Rocking Horse Assembly?
When you're putting things together, there are always a few little things that can make the process easier or, conversely, a bit more frustrating if you're not careful, you know? One common thing to watch out for is making sure you're using the right screws for the right holes. Sometimes, screws can look very similar but be slightly different lengths, and using the wrong one can cause issues, like poking through to the other side or not holding firmly. So, take a quick moment to match them up with the pictures in the manual, which is actually a really good habit to get into.
Another point to consider is the orientation of parts. Some pieces might look symmetrical but actually have a specific "front" or "back" or "up" or "down." If you put a piece on backward, you might find that the next part doesn't fit, or the holes don't line up, which can be pretty annoying. The instructions for your Qaba rocking horse assembly will typically have arrows or clear diagrams to show you the correct way. Just pause for a second and compare the piece in your hand to the image before you screw it in, and you'll save yourself some hassle.
Also, don't rush the process, that's what I mean. It's not a race. If something feels like it's not fitting, or if you have to really force it, chances are something isn't quite right. Instead of pushing harder, take a step back, look at the instructions again, and check the alignment of the pieces. Sometimes, just a slight adjustment can make all the difference. This little bit of patience will ensure that your Qaba rocking horse assembly is done correctly and safely, and it will actually save you time in the long run by avoiding mistakes.
Adding the Plush Friend - The Final Steps of Qaba Rocking Horse Assembly
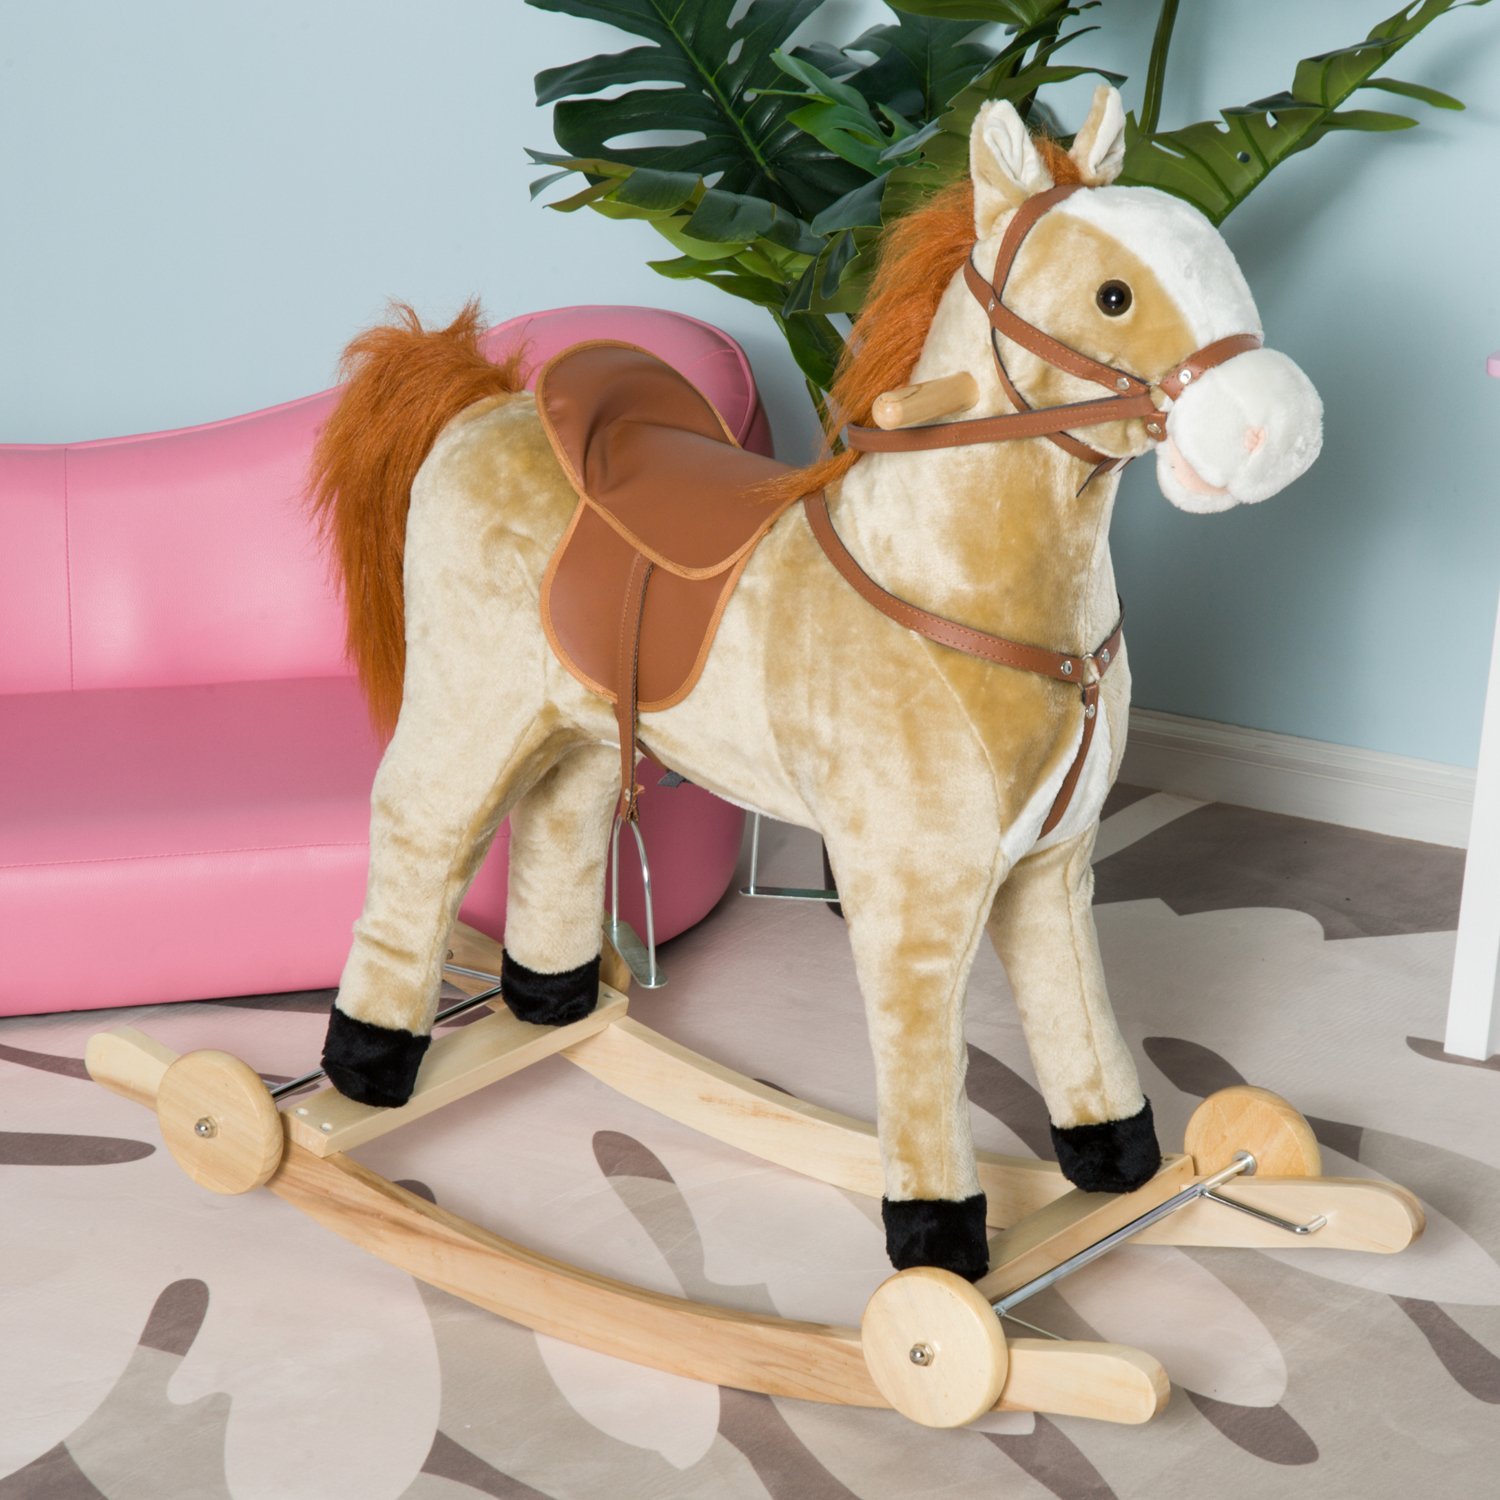
Once the sturdy wooden base is all set up, the next big step is usually attaching the plush animal body to it. This is where your rocking horse really starts to take shape and look like the fun toy it's meant to be. The Qaba rocking horses often have a strong metal frame inside their soft plush covering, and this frame is designed to connect securely to the wooden base. You'll typically find some bolts or screws that go through the metal frame and into designated spots on the wooden base, which is pretty clever.
You might need to line up a few holes carefully for this part. It can sometimes be a little bit of a balancing act to hold the plush body steady while you insert the fasteners, so if you have someone around to lend a hand, now might be a good time to ask for it, you know? Just like with the base, start by loosely attaching all the bolts or screws. This allows you to make any small adjustments needed to ensure the animal is sitting straight and secure on its base. Once everything is lined up, then you can go back and tighten everything down firmly.
Some Qaba rocking horses, like the ones with realistic sounds, might also require battery installation at this stage or just after the main assembly. The instructions will tell you exactly where the battery compartment is, usually in a hidden spot on the animal's body. Make sure to use the correct type and number of batteries, as specified in the manual. This step is what brings the toy to life with those fun hoofbeats or whinnies, adding an extra layer of interactive play to your child's new friend, and it's actually quite neat to hear for the first time after your Qaba rocking horse assembly.
Is Your Qaba Rocking Horse Assembly Really Done?
After you've tightened all the screws and the rocking horse looks complete, it's a really good idea to do a final check, you know? This is a bit like a quality assurance step, making sure everything is as it should be before your little one hops on for their first ride. Go around the entire toy and give every screw and bolt a gentle tug or a slight turn to confirm it's snug. You want to make sure there are no loose connections that could cause a wobble or, worse, come undone during playtime, which is pretty important for safety.
Also, take a moment to feel around the rocking horse for any sharp edges or rough spots that might have been overlooked. Qaba toys are generally made with smooth finishes, but it's always good to double-check, just in case. Run your hand along the wooden base and the plush body to ensure everything feels safe and comfortable for little hands and legs. This quick inspection helps ensure that the Qaba rocking horse assembly has resulted in a perfectly safe and ready-to-use toy, which is really what we're aiming for.
If your rocking horse has sound features, now is the time to test them out. Give the horse a little rock or press the designated button to make sure the hoofbeats and whinnies are working as expected. This also confirms that the batteries are installed correctly. A fully functional and safe rocking horse is the goal, so these final checks are actually quite valuable. It means you're not just done with the Qaba rocking horse assembly, but you're done with confidence, knowing your child is about to have a wonderful time.
Keeping Your Qaba Rocking Horse Assembly Safe and Sound
Beyond the initial setup, keeping your Qaba rocking horse in tip-top shape and ensuring it remains a safe plaything for your child involves a few ongoing considerations, you know? It's a good idea to periodically check the fasteners, perhaps once every few months, depending on how much it's used. Just a quick check to make sure all the screws and bolts are still tight can prevent any parts from becoming loose over time. This simple habit helps maintain the stability of the rocking horse and keeps it secure for continued play, which is pretty easy to do.
Also, think about where the rocking horse is placed in your home. You'll want to put it on a flat, even surface, away from any stairs, sharp furniture corners, or other hazards. Giving your child plenty of clear space to rock back and forth without bumping into anything is really important. Even though Qaba rocking horses are built with safety in mind, like their sturdy wooden bases and strong metal frames, the environment they're used in plays a big part in overall safety. It's basically about creating a safe play zone for your little one.
If the rocking horse gets a little dusty or needs a clean, a soft, damp cloth is usually all you need for the plush areas and the wooden base. Avoid harsh chemicals, as they can damage the materials. For models with sound features, make sure to keep the battery compartment dry and sealed. Following these simple maintenance tips, which are actually quite easy to remember, will help ensure that your Qaba rocking horse, assembled with care, provides many years of happy, safe rocking adventures for your child. It's all about keeping that wonderful toy in great condition for the long haul.
This guide walked through the process of putting together a Qaba rocking horse, covering everything from unboxing and gathering your tools to the actual step-by-step assembly of the base and attaching the plush animal. It also touched on important checks to make during and after the assembly, and offered tips for ongoing safety and maintenance of the toy.

Detail Author:
- Name : Mr. Justice Wilkinson
- Username : ewiza
- Email : enos96@gmail.com
- Birthdate : 1994-10-05
- Address : 66107 Neoma Hill Suite 939 Griffinchester, NY 79567-3133
- Phone : +1-850-407-3159
- Company : Dickens-Brown
- Job : Computer Scientist
- Bio : Earum perspiciatis sapiente eos tenetur rerum autem esse. Repellat ex enim recusandae soluta. Placeat rerum ipsum omnis illo nihil.
Socials
instagram:
- url : https://instagram.com/trevor_official
- username : trevor_official
- bio : Voluptates similique iusto tenetur dolor assumenda. Consequatur ex voluptatum sit.
- followers : 506
- following : 794
facebook:
- url : https://facebook.com/casper1984
- username : casper1984
- bio : Maiores eveniet ut laudantium.
- followers : 202
- following : 2946
tiktok:
- url : https://tiktok.com/@trevor.casper
- username : trevor.casper
- bio : Aspernatur aut optio ullam. Hic exercitationem minima ipsum nihil eos et.
- followers : 1735
- following : 1239
