Giving Your T-Shirt A Fresh New Look - Cutting The Neckline
- Getting Started - A Little Change Can Do So Much
- Why Think About Adjusting Your Collar?
- Picking Your Style - What Look Feels Right for You?
- Tools You Will Need for Cutting the Neckline of a T-Shirt
- How to Prepare Your Shirt for its New Shape?
- The Actual Cut - Taking Your Time with the Fabric
- What if You Make a Small Mistake?
- Care After Cutting the Neckline of a T-Shirt
Sometimes, a simple piece of clothing, like a favorite t-shirt, might not quite feel like it fits your personal flair, especially around the collar area. You know, that feeling when the neckline just feels a bit too snug, or perhaps it is just a little too high for your liking? Well, it turns out, giving that shirt a little bit of a fresh outline around the neck can truly transform its whole vibe. It's a way to make something you already own feel like something brand new, and it's a project many people find quite satisfying.
There are quite a few reasons someone might want to change the neck area of a t-shirt. Maybe you have a shirt with a really cool design, but the standard crew neck just isn't what you are going for, or perhaps it just feels a little constricting. Maybe you want to give an old garment a new lease on life, turning something that sits in your closet into a piece you genuinely love to wear. It's actually a pretty straightforward way to add a touch of your own personality to everyday items, and it doesn't require a lot of special tools, which is nice.
This little adjustment can make a big difference in how a shirt hangs, how it feels on your skin, and how it looks with different outfits. It’s about making your clothes truly yours, allowing them to reflect your comfort and your style choices. Plus, it is a fun, creative activity that can bring a lot of satisfaction. So, if you have ever considered giving one of your shirts a fresh, open feel around the neck, you are certainly in the right place to get some ideas.
Why Think About Adjusting Your Collar?
You might be wondering, what's the big deal about changing a t-shirt's neckline? Well, in some respects, it's about more than just a different look. Often, a shirt might fit perfectly everywhere else, but the collar feels a little too tight, or it just doesn't sit right. For many, a standard crew neck can feel a bit restrictive, especially on warmer days or when you are looking for a more relaxed appearance. Adjusting the neckline, you know, can make a shirt feel more comfortable and breathable, which is a pretty big plus.
Then there's the style aspect. Maybe you have a particular necklace you love to wear, but your current t-shirt necklines always seem to cover it up. Or perhaps you are going for a more casual, laid-back feel, and a wider or lower neck opening just suits that mood better. It's also a fantastic way to rescue shirts that you might otherwise not wear. You know, if a shirt is sitting in your drawer because the neck feels wrong, a quick alteration can turn it into a favorite. It truly helps to personalize your wardrobe, making sure each piece feels like it belongs to you, which is a good feeling.
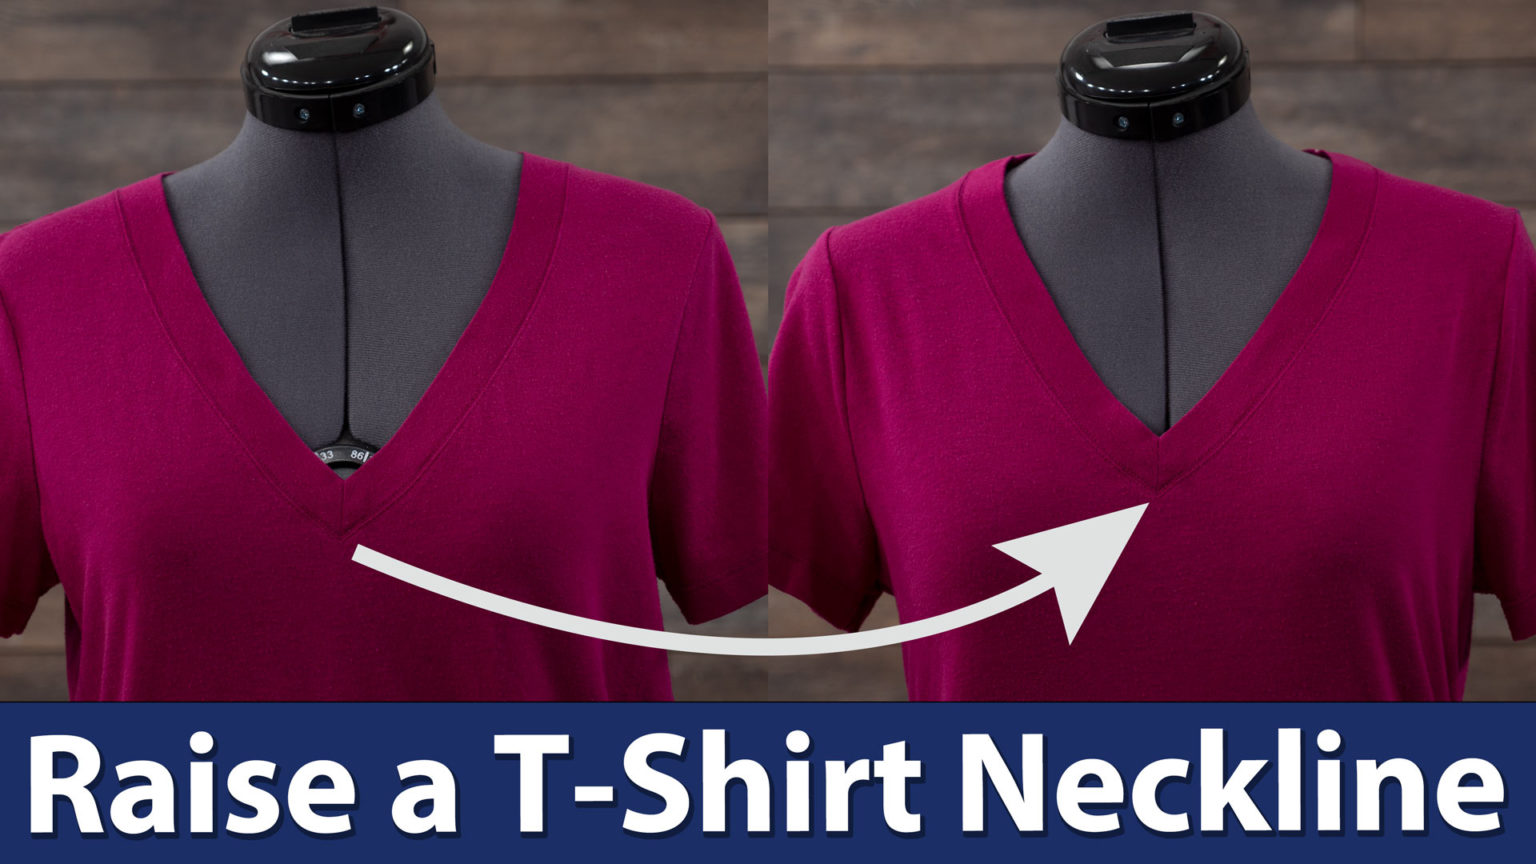
Furthermore, this simple change can completely alter the way a shirt drapes on your body. A wider neck might give a more relaxed, off-the-shoulder kind of look, while a deeper cut can elongate your neck and create a different silhouette. It's a small adjustment that can have a rather significant impact on the overall fit and feel of the garment. So, there are many good reasons to think about giving your t-shirt collars a little bit of a refresh.
- Pambansang Kolokoy New Wife
- Blind Ice Skater
- What Does Sugarfoot Mean
- Ni%C3%A3o De Jarabacoa
- Water Polo Clothing Malfunction
Picking Your Style - What Look Feels Right for You?
Before you even pick up your tools, it's a good idea to think about the kind of neckline you are hoping to create. There are quite a few options, and each one offers a somewhat different feel. For instance, you could go for a simple, wider crew neck, which basically just makes the existing neck opening a little more generous. This is a pretty popular choice if you just want a bit more breathing room without changing the overall shape too much. It's a subtle tweak, but it can make a big difference in comfort, you know.
Then there's the scoop neck, which is a deeper, rounded cut. This style tends to be more open and can feel a lot more casual. It's a good choice if you want to show off a bit of your collarbone or wear a statement necklace. You could also consider a V-neck, which, as the name suggests, forms a "V" shape at the front. V-necks can be quite flattering and come in various depths, from a shallow dip to a much deeper plunge. Each of these styles gives a unique look when cutting the neckline of a t-shirt, so it's worth considering what suits your personal taste.
Another option, though a little less common for beginners, is an off-the-shoulder look, which involves cutting a much wider opening that can sit lower on your shoulders. This creates a very relaxed, breezy style, often seen in summer wear. You might also just want to snip off the existing ribbed collar for a raw, unfinished edge, which gives a very casual, almost distressed appearance. Thinking about these different styles beforehand helps you plan your cut and ensures you get the look you are truly aiming for, so it's a pretty important first step.
Tools You Will Need for Cutting the Neckline of a T-Shirt
To get started on this little project, you don't actually need a whole lot of fancy equipment. The good news is, most of the things you'll need you probably already have lying around your home. First and foremost, you'll need a decent pair of scissors. Not just any scissors, though. You really want a pair that's sharp and designed for fabric. Using dull scissors can lead to jagged edges and frustration, which, you know, isn't what we're going for here. A good, sharp pair will make clean, crisp cuts, which is pretty essential for a neat finish.
Next up, you'll want something to mark your cutting line. A piece of tailor's chalk is perfect for this, as it shows up clearly on fabric and brushes away easily. If you don't have chalk, a regular pencil can work on lighter fabrics, or even a fine-tipped marker that will be cut away anyway. You'll also want a ruler or a measuring tape to help you get your lines straight and even. This is particularly helpful if you are aiming for a symmetrical design, so it's quite useful to have nearby.
Finally, a flat surface to work on is pretty important. A clean table or even a hard floor will do. You might also want a piece of cardboard or an old magazine to put inside the shirt if you are worried about cutting through both layers by mistake. This acts as a protective barrier, which can be quite reassuring, especially if it's your first time cutting the neckline of a t-shirt. Having these simple items ready before you start will make the whole process much smoother and more enjoyable, honestly.
How to Prepare Your Shirt for its New Shape?
Getting your t-shirt ready before you start snipping is a pretty key step to making sure your new neckline turns out just right. First off, you should wash and dry the shirt you plan to alter. This is important because some fabrics can shrink a little after their first wash, and you want to make sure any shrinking happens before you cut. You wouldn't want to cut a perfect neckline only for it to get smaller and tighter after laundry day, you know? So, a quick wash cycle is a good idea to ensure stability.
Once it's clean and dry, lay your t-shirt out as flat as you possibly can on your work surface. Smooth out any wrinkles or bumps, making sure the front and back layers are perfectly aligned. This is actually quite important for getting a symmetrical cut. If the fabric is bunched up or uneven, your cut might end up crooked, which is something you definitely want to avoid. Take a moment to really flatten it out, perhaps even pressing it down firmly with your hands.
Now, this is where you start to mark your cutting line. Using your chalk or pencil, draw the shape of your desired neckline onto the shirt. If you are going for a V-neck or a scoop, you might want to fold the shirt in half lengthwise first. This helps you draw one side of the shape, and when you unfold it, you'll have a perfectly mirrored line on the other side. This little trick is very helpful for achieving an even look when cutting the neckline of a t-shirt, so it's worth taking the time to do it carefully.
The Actual Cut - Taking Your Time with the Fabric
With your shirt prepared and your lines marked, it's time for the actual cutting. This is where you want to be a little patient and take your time. Remember, you can always cut more fabric off, but you can't put it back on, which is a pretty good rule to keep in mind. Start by making small, steady cuts along your marked line. Don't try to snip it all in one go, especially if you are cutting a curved shape. Shorter snips give you more control and help you follow your line more precisely.
If you are creating a V-neck, you might want to start from the outer edges of your V and cut inwards towards the point. For a scoop or a wider crew neck, just follow the curve smoothly. Keep your fabric flat and taut as you cut, but don't stretch it. Stretching the fabric while cutting can lead to a wavy or uneven edge once it relaxes, and you really want a clean finish. So, maintaining a steady hand and a relaxed grip on the fabric is quite helpful here.
After you have made your initial cut, it's a good idea to try the shirt on. This gives you a chance to see if the neckline is the right depth and width for your liking. Sometimes, you might find you want to take off just a little bit more, or perhaps refine the curve a bit. This trying-on step is pretty crucial because it allows for those final adjustments before you commit. It's all about getting that feeling just right when cutting the neckline of a t-shirt, you know?
What if You Make a Small Mistake?
It's totally normal to feel a little bit worried about making a mistake when you are cutting into a favorite shirt. But honestly, even if you do make a small error, it's often not the end of the world, and there are ways to fix things or even turn a little slip-up into something unique. For example, if your cut isn't perfectly straight, or if one side is slightly lower than the other, you can usually even it out by simply cutting a little more off the higher side. Just take small, tiny snips until it looks balanced, which is pretty easy to do.
If you accidentally cut a bit too deep or too wide, you might think the shirt is ruined, but that's not necessarily true. You could embrace a more distressed or "raw" edge look. Sometimes, just letting the fabric roll up naturally after washing can give it a cool, undone vibe. You could also add a decorative stitch around the edge, like a simple blanket stitch, to give it a finished look and hide any minor imperfections. This actually adds a nice, handmade touch, you know.
For more significant slips, like a really uneven cut, you could consider adding a fabric trim or a lace detail around the new neckline. This not only covers the mistake but also adds a completely new design element to the shirt. It's a way to turn a "whoops" moment into a creative opportunity. So, don't let the fear of a small slip stop you from trying this out. Most little issues when cutting the neckline of a t-shirt can be managed with a bit of creativity, which is pretty reassuring.
Care After Cutting the Neckline of a T-Shirt
Once you have given your t-shirt its brand new neckline, you might be wondering about how to care for it. Since you've created a raw edge, the fabric at the cut line might tend to curl or fray a little, especially after washing. This is actually pretty common, and for many people, this natural curling or slight fraying is part of the desired look, giving the shirt a more casual, worn-in feel. If you like that effect, then you don't really need to do anything special at all, which is convenient.
However, if you prefer a neater edge and want to minimize fraying, there are a couple of things you can do. One option is to machine wash your shirt on a gentle cycle, perhaps even putting it in a mesh laundry bag to protect the raw edge. You could also hand wash it, which is even gentler. After washing, you can either lay it flat to dry or hang it up. Avoiding the high heat of a dryer might also help to keep the edge from curling too much, so that's something to think about.
For a more durable and less frayed edge, you could consider adding a simple stitch around the new neckline. A basic zigzag stitch on a sewing machine, or even a hand-sewn running stitch, can help to secure the fabric and prevent excessive unraveling. This gives a much more finished look, almost like a store-bought garment. So, depending on the look you are going for, there are different ways to care for your t-shirt after cutting the neckline, ensuring it stays looking great for a long time, you know?
Changing the neckline of a t-shirt is a wonderfully simple way to refresh your wardrobe and make your clothes feel more like you. From picking the right style that speaks to your personal taste, gathering just a few basic tools, and carefully preparing your garment, each step plays a part in achieving a look you'll love. Even if a small slip happens, there are creative ways to handle it, turning any little mishap into a unique design feature. And with a little thought about how to care for your newly altered top, you can keep it looking good, whether you prefer a raw, relaxed edge or something a bit more refined. It's a fun, practical project that really lets your individual style shine through.

Detail Author:
- Name : Carmen Heidenreich
- Username : noreilly
- Email : donnie16@williamson.info
- Birthdate : 2006-08-11
- Address : 793 Lesch Plaza Apt. 389 Deionchester, OH 09798
- Phone : +18312466842
- Company : Gutmann-Murazik
- Job : Distribution Manager
- Bio : Dolorem ut dolor at est repellendus sunt quo ipsa. Voluptatum et at aut et. Eos similique enim id magnam. Magni officia illo voluptas omnis eveniet minima.
Socials
facebook:
- url : https://facebook.com/immanuel.o'kon
- username : immanuel.o'kon
- bio : Minus repellat tempore et et est sint. Omnis tempora at voluptatem blanditiis.
- followers : 997
- following : 311
linkedin:
- url : https://linkedin.com/in/o'kon2025
- username : o'kon2025
- bio : Molestiae sint accusamus provident.
- followers : 6616
- following : 285
twitter:
- url : https://twitter.com/immanuel.o'kon
- username : immanuel.o'kon
- bio : Porro voluptatibus fugiat repellat et. Inventore quisquam voluptas culpa ab distinctio et ut.
- followers : 3804
- following : 1444
instagram:
- url : https://instagram.com/immanuel_o'kon
- username : immanuel_o'kon
- bio : Et a voluptatem cupiditate. Minus dolorem quod ipsa quia consequatur rerum fugiat.
- followers : 3539
- following : 2191
